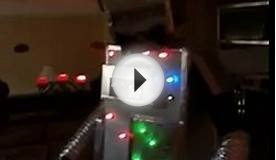
Cardboard box Robot Costume
Step #2:
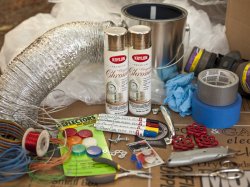
Gather your materials and set up a workspace with dropcloths.
Step #3:
Size up the child who will be wearing the costume. Make sure that the boxes you have will fit their body and head. The box should be big enough so that their movements aren't hindered, but small enough to allow them to put their arms down at their sides.
Step #4:
- Mark and cut the necessary holes in the boxes.
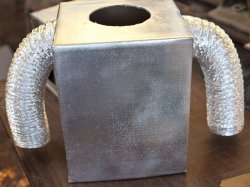
- For the robot's body, cut a hole for the child's head in the top of the box. Cut two arm holes the same circumference as the ducting in the sides of the box. For the legs, just cut the bottom out of the box entirely.
- Use a smaller box for the robot's head. Cut a hole in the bottom of the box, centered and wide enough so that it will slip over the child's head.
 Then cut a mouth into the front of the box, large enough for the child to have plenty of room to see.
Step #5:
Tape the flaps down after you have cut out the holes.
Step #6:
Prep for painting by throwing on some painting clothes. Don't forget to wear your respirator.
Step #7:
- Rattle the paint can for 2 minutes to mix the Krylon Premium Metallic. It's a heavy paint, so mixing it well is important.
- Hold the can 10 to 12 inches from the box and press the nozzle down to spray.
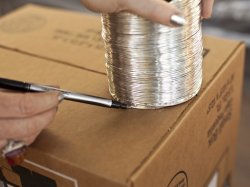 Use smooth swooping motions to cover the box evenly and without drips.
 - Apply 2 coats of paint, allowing 5 minutes for the paint to dry in between. If your box is printed, you might need more layers for a perfect finish.
- Set the painted boxes aside to dry for 20 minutes.
Step #8:
Cut the dryer ducting in half and tape one end of each piece into the arm holes. Just reach inside the box from the bottom and secure the inside of the ducting to the inside of the box with duct tape.

Step #9:
Attach the faucet handle ears to either side of the head with the nuts and bolts.
Step #10:
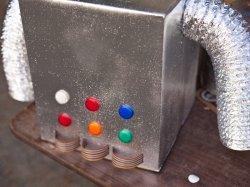
Cut slots in the front of the box and weave wires through them. Tape the ends down on the inside of the box to hold them in place.
Step #11:
Attach the reflectors to the front of the box. The reflectors I used had adhesive backing, otherwise use glue or duct tape.
Step #12:
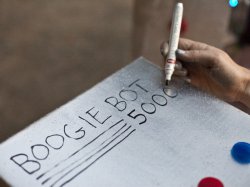
Use the Krylon Short Cuts paint pen to draw the model number of your robot onto the front of the box. To get the paint flowing, press the tip of the pen down firmly. Once it's saturated with paint, use normal pressure to write and draw.
Step #13:
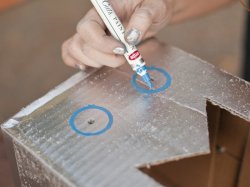
- Poke two holes above the mouth for the LED eyes. Use the Krylon Short Cuts paint pen to draw large circles around the holes, then attach the LEDs.
- The LED eyes are really simple. Drop the leads into the eyeholes, and then slip the battery in between the leads. The long lead on the LED connects to the positive side of the battery- the short lead to the negative side. Tape them together with a bit of painter's tape. They will glow until the battery runs out, at least a couple of days.
|
Photo Jigsaw Puzzle of Child in Fancy Dress Robot Costume - 1966 Home (Prints Online)
|
|
Photo Jigsaw Puzzle of Three musical automata Home (Prints Online)
|
|
Photo Jigsaw Puzzle of Automaton from Dresden Home (Prints Online)
|
|
Photo Jigsaw Puzzle of Automaton mandolin player Home (Prints Online)
|
